AAPANEL FTP: HOW TO MANAGE AND CUSTOMIZE SIDEBAR MENU
aaPanel is a popular hosting control panel that provides a user-friendly interface for managing web hosting accounts. One of its key features is the FTP (File Transfer Protocol) management tool, which allows you to manage your website files easily. The sidebar menu in aaPanel FTP can be customized to show only the features you use most often. In this article, 1Byte will show you a step-by-step guide to help you manage and customize the sidebar menu in aaPanel FTP. But firstly you should understand what is aaPanel FTP and its benefits.
What Is aaPanel FTP?
aaPanel FTP is a software application that allows users to transfer files between their local computer and a remote server. Most often, it is used by businesses and website owners to exchange large files or manage website content; however, it can also be used by individuals for personal reasons.
There are many different FTP clients available, so you should carefully consider your needs and technical skills before choosing one. Some of the most popular options include FileZilla, Cyberduck, Transmit, and Adobe Dreamweaver.
Benefits of Using aaPanel FTP
There are several key advantages to setting up FTP on aaPanel – including convenience, speed, and security. Most FTP clients make it easy to upload and download large files in just a few minutes, which can be extremely important for businesses that need to exchange large amounts of data with clients or partners.
Additionally, many FTP systems offer robust security features that help protect your data from unauthorized access or corruption. This should prove especially useful if you regularly handle sensitive information or files containing valuable intellectual property.
Finally, most FTP clients are relatively easy to learn and use, so they are often a good choice for individuals who prefer simple software tools.
How to Set Up and Manage aaPanel FTP?
We will show you how to set up & manage aaPanel FTP – including all of the most frequently asked actions step-by-step. Every instruction below will be followed with captured images from 1Byte dashboard for demonstration. Let’s dive in now!
- Add FTP Account

At the FTP session, choose Add FTP.
There is a pop-up, you need to fill in the Username, Password, and Root directory.
Then, submit it when you finish.
- Change FTP Port
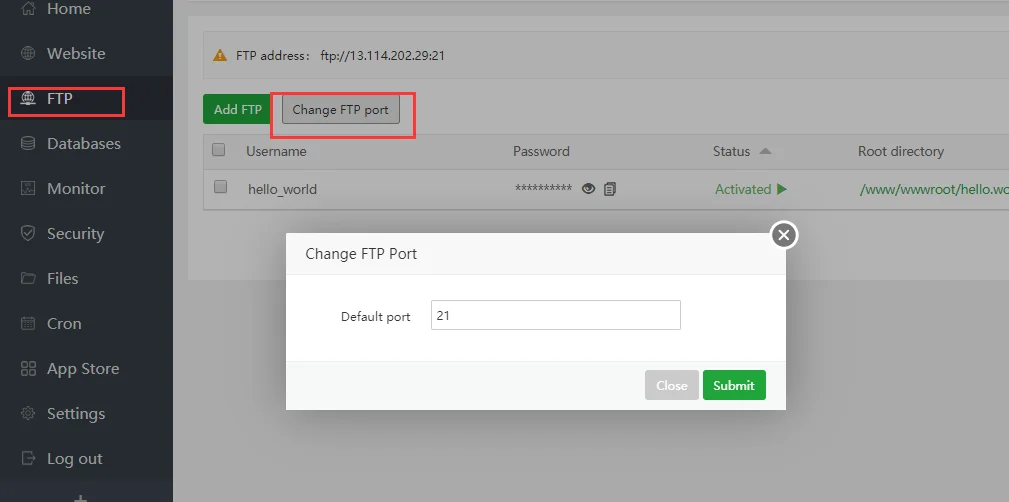
Click on the Change FTP port button
Add Default port, and Submit.
Notes: The filled port must be checked before altering the default FTP port. FTP will not function correctly if it is already in use.
- Change FTP Password
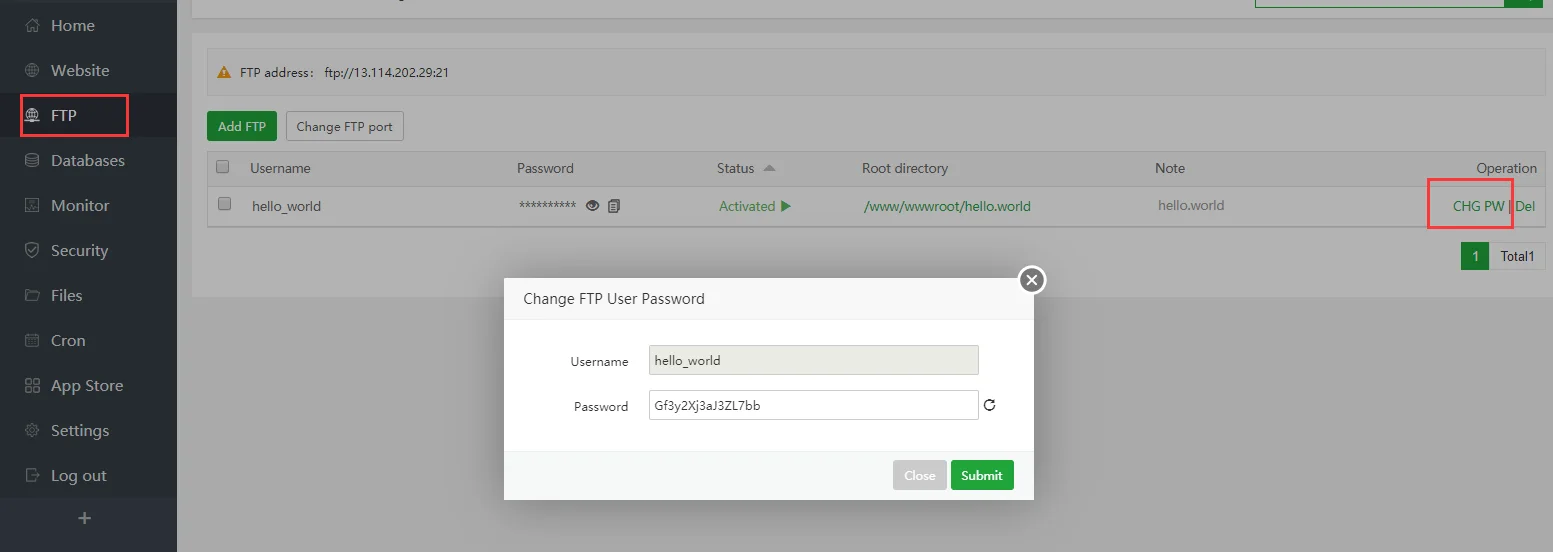
In the Operation column, click on “CNG/PWD” (an abbreviation for Change Password).
You will see the pop-up as the image above, in the Password field – type your new one and Submit.
- Switch FPT State
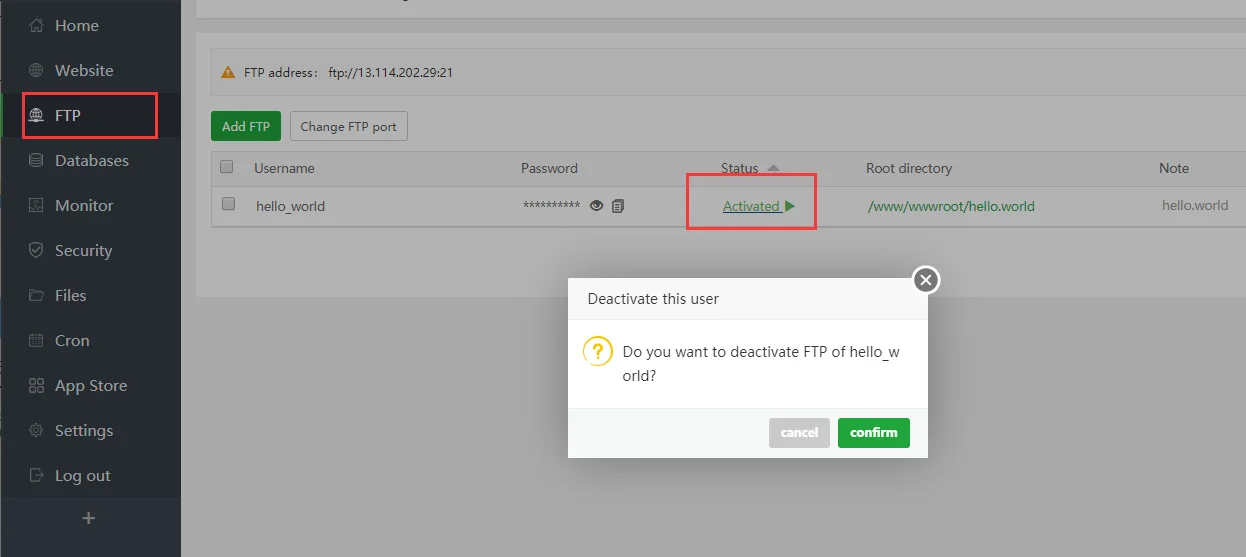
In the Status column, you will see if any FTP is activated or not.
If an FTP is activated, click on it to deactivate it and vice versa.
Click Submit to save your changes.