Dockerfile build image example
Use Dockerfile to build your own tomcat image
First, create a directory to store the files needed to build the image.
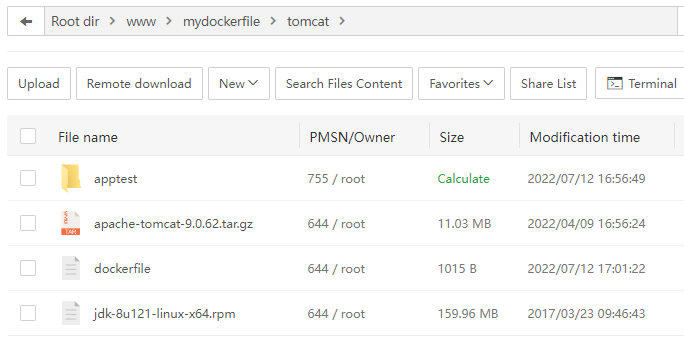
As shown in the figure:
My files are stored in /www/mydockerfile/tomcat directory, dockerfile file, test project apptest directory, tomcat, jdk
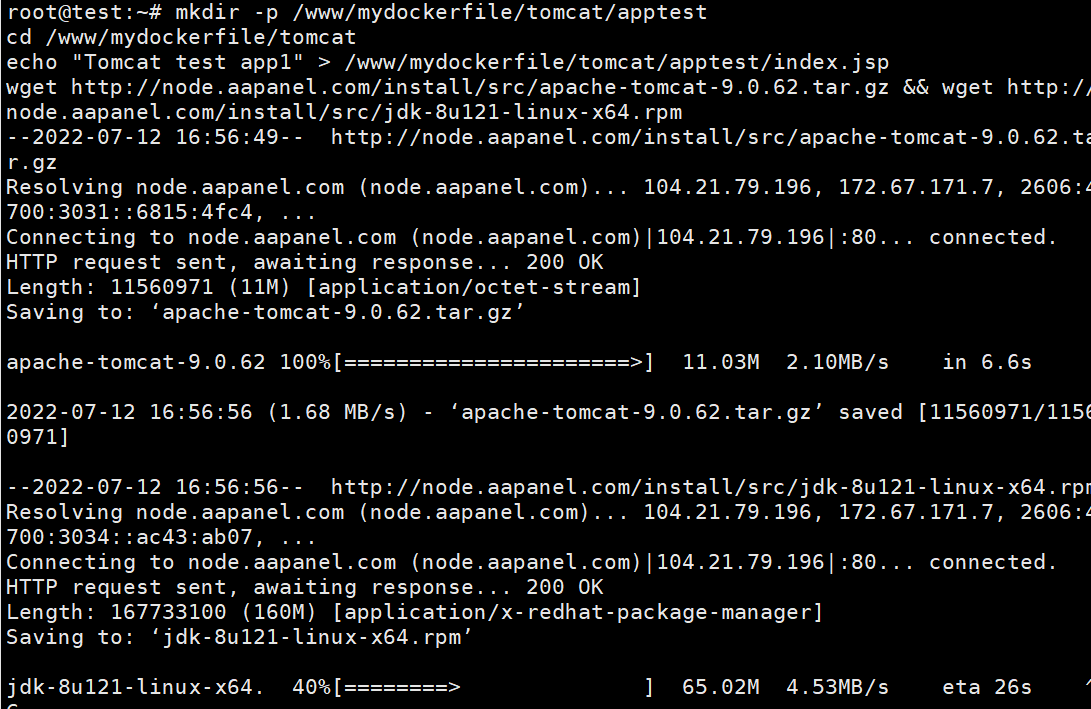
Create a directory, enter the directory, download tomcat, jdk, create a test page
mkdir -p /www/mydockerfile/tomcat/apptest
cd /www/mydockerfile/tomcat
echo "Tomcat test app1" > /www/mydockerfile/tomcat/apptest/index.jsp
wget http://node.aapanel.com/install/src/apache-tomcat-9.0.62.tar.gz && wget http://node.aapanel.com/install/src/jdk-8u121-linux-x64.rpm
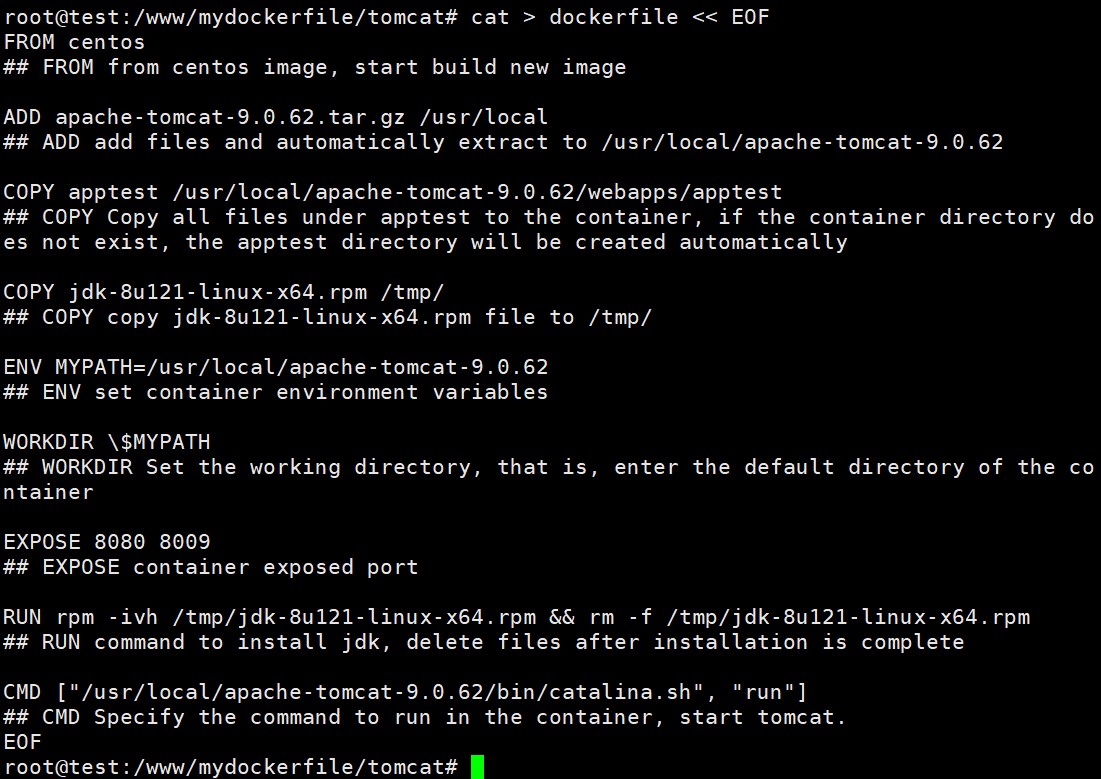
The content of the dockerfile file is as follows: Please use the terminal or SSH tool to create it directly.
cat > dockerfile << EOF
FROM centos
## FROM from centos image, start build new image
ADD apache-tomcat-9.0.62.tar.gz /usr/local
## ADD add files and automatically extract to /usr/local/apache-tomcat-9.0.62
COPY apptest /usr/local/apache-tomcat-9.0.62/webapps/apptest
## COPY Copy all files under apptest to the container, if the container directory does not exist, the apptest directory will be created automatically
COPY jdk-8u121-linux-x64.rpm /tmp/
## COPY copy jdk-8u121-linux-x64.rpm file to /tmp/
ENV MYPATH=/usr/local/apache-tomcat-9.0.62
## ENV set container environment variables
WORKDIR \$MYPATH
## WORKDIR Set the working directory, that is, enter the default directory of the container
EXPOSE 8080 8009
## EXPOSE container exposed port
RUN rpm -ivh /tmp/jdk-8u121-linux-x64.rpm && rm -f /tmp/jdk-8u121-linux-x64.rpm
## RUN command to install jdk, delete files after installation is complete
CMD ["/usr/local/apache-tomcat-9.0.62/bin/catalina.sh", "run"]
## CMD Specify the command to run in the container, start tomcat.
EOF
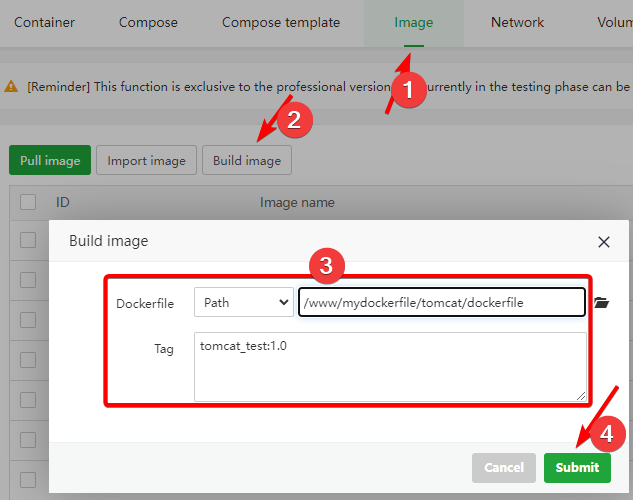
Build tomcat image:
Docker --> Image --> Build Image
Dockerfile: /www/mydockerfile/tomcat/dockerfile
Tag: tomcat_test:1.0
Build image complete

Create a container using the built image:
Container --> Add container Note: The container added this time does not have data persistence set. If necessary, please set it at the Volume
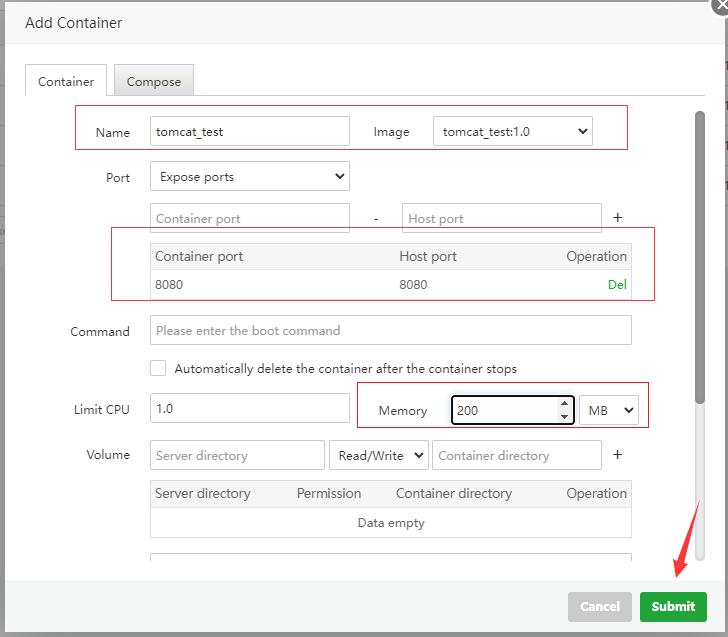
Container created successfully

Access the tomcat of the container, if you cannot access it, please open port 8080 in the Security interface
Use a browser to visit and check the effect: http://ip:8080/apptest/

For more information on how to use the dockerfile command, please check the official Docker documentation:
https://docs.docker.com/engine/reference/builder/